Seams that support a simple tote bag
On a fabric tote, the transitions between the base, sides, and handles matter more than an extra decorative line of stitching.
The fabric is part of the structure
A seam depends on the cloth beside it remaining sound. Choose a sturdy woven fabric that your machine can still sew comfortably. Loosely woven material may pull apart beside a dense seam; adding more tiny stitches does not necessarily strengthen it. Make a sample using the same number of layers that will meet at the folded top edge.
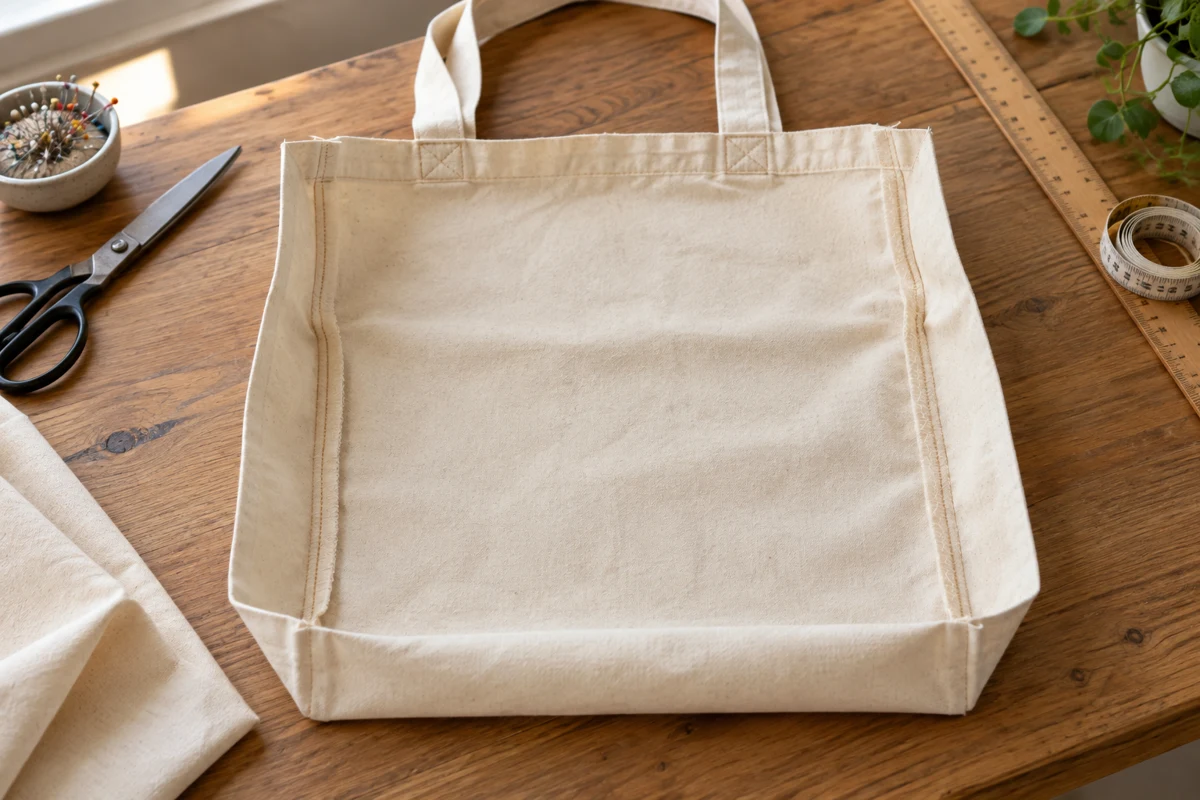
For a manageable plain bag, start with two rectangles measuring 37 × 42 cm, roughly 14½ × 16½ inches. A 1 cm allowance on the sides and bottom, plus a top hem turned by 1 cm and then 3 cm, produces a bag approximately 35 × 37 cm. Prepare the handles separately. These dimensions describe a construction example, not a safe weight rating.
Join the three closed edges
Place the panels right sides together and pin the sides and base. Sew these edges with a consistent allowance. Use an ordinary straight-stitch length that forms clean stitches on your test piece. Extremely short stitches can perforate dense material unnecessarily. Secure the seam ends without repeatedly stitching over the same tiny area until it becomes a hard lump.
Finish the raw allowances together with zigzag stitching or a suitable serger stitch. This edge finish sits outside the structural straight seam. If you add a second straight line, leave space between the rows rather than creating a narrow strip of closely punched fabric. Check both lower corners for missed layers or loose stitches before turning the bag.
Use the folded top to support the handles
Press the top inward by 1 cm and then another 3 cm. Place the handle ends beneath this fold, arranging each pair symmetrically and checking that neither strap is twisted. Try the proposed handle length against your body before stitching. Sew the hem, turn the handles upward, and reinforce each attachment with a rectangle and two diagonals through the layered area.
A box with an X is not a promise that a bag can carry any load. Fabric condition, thread, strap width, and stitch quality all affect the result. If the machine will only cross the layers when you pull hard, stop and reconsider the thickness. Forcing the material can deflect the needle and produce poor stitches exactly where the bag needs a reliable connection.
Inspect the first few uses
Try a few light objects while holding the bag over a low, soft surface. Look at the handle attachments for opening stitches or separated fabric threads. A top edge that distorts sharply is a sign that this construction is being asked to carry too much. Heavy bottles, sharp-edged items, and valuable electronics make poor first tests. After a few uses, inspect the edges of the handle attachments again; fraying often starts there before the center of a stitched rectangle looks visibly different.