Sew on a patch pocket neatly
Finish the open top first, then attach the pocket to the larger fabric panel.
Work backward from the visible size
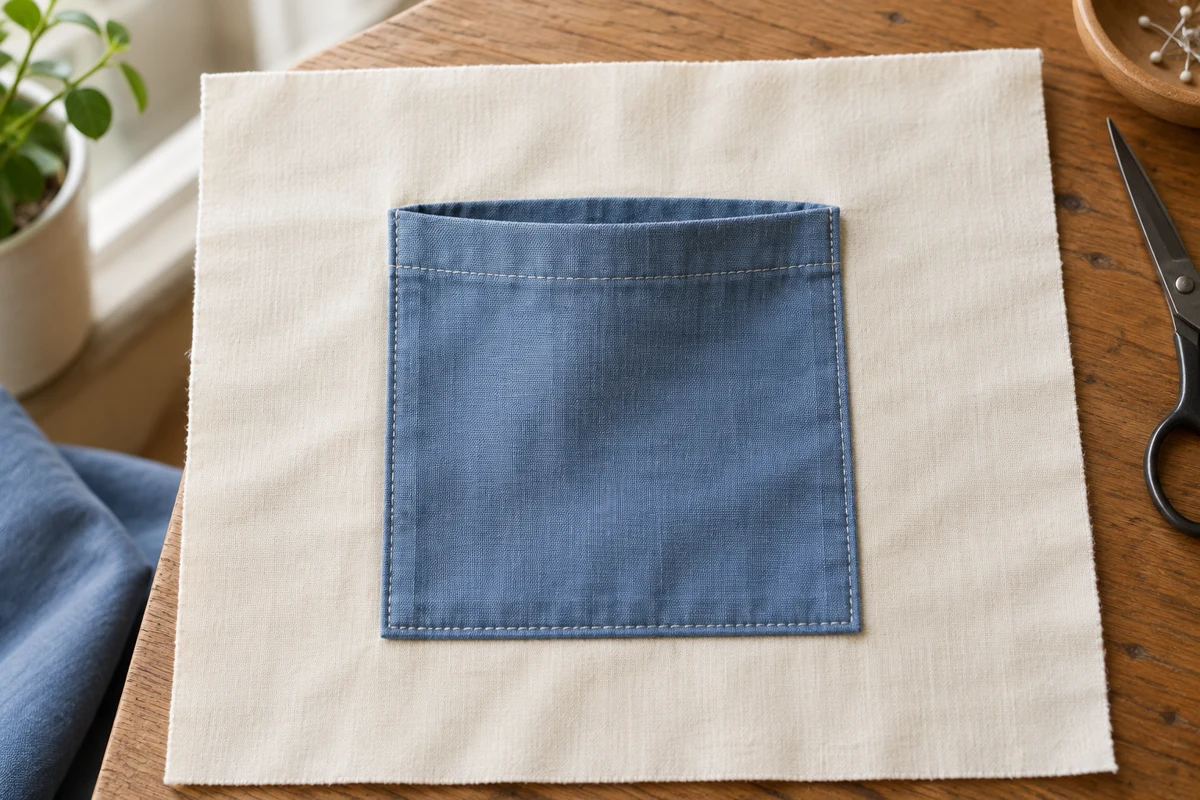
For a finished patch pocket about 10 cm wide and 12 cm tall, cut a rectangle 12 × 15 cm, approximately 4¾ × 6 inches. Allow 1 cm at each side and the bottom, with two 1 cm turns at the top. A stable woven fabric is easier for a first attempt because the opening is less likely to stretch while being handled.
Check the proposed size against its contents. Small fabric scissors need more depth than a folded handkerchief. Sharp tools still require an appropriate protective cover; a sewn pocket is not puncture-proof packaging. Consider how the object will sit rather than measuring only its widest point against the empty pocket.
Attach it before closing the larger project
On a new tote, sew the pocket to the front while that panel is still flat. The same area becomes harder to reach after the bag sides close. Mark the future bag seam lines so the pocket does not sit too near an edge or disappear partly into a later seam.
A very thin pocket fabric may benefit from a second layer. That changes the construction: prepare a small turned unit rather than doubling every folded edge. Decide before cutting. Adding an improvised glued reinforcement inside an already finished pocket can make cleaning harder and may leave a loose edge.
Keep the top accessible
Press the upper edge inward twice by 1 cm and stitch the hem close to its inner fold. Turn the side and bottom allowances inward by 1 cm. At the lower corners, fold a little excess diagonally to reduce the stack of fabric. Look at the right side before trimming anything away.
Position the pocket on the larger panel, measuring from a dependable edge. A printed stripe is useful only if it follows a genuinely straight line. Hold the pocket flat without stretching its sides. Basting is helpful when repeated adjustments to pins keep disturbing the placement you just measured.
Stitch around three sides
Start at one upper corner and sew close to the folded side, across the bottom, and up the other side. Leave the top opening unstitched. Pivot with the needle in the cloth at the lower corners. Secure both upper ends because they receive repeated movement whenever a hand or object enters the pocket.
A small triangular reinforcement can work on firm woven fabric, but its size should suit the pocket. On thin material, a very dense bar tack may weaken the fibers instead of helping. Try the reinforcement on a scrap with the same backing layers. Finally, check that the opening sits level and accepts its intended contents without pulling. If the base fabric puckers, release the affected seam and baste the pocket back in place without tension. Pressing the wrinkles flat will only disguise the underlying mismatch temporarily.