A small fabric basket with a flat base
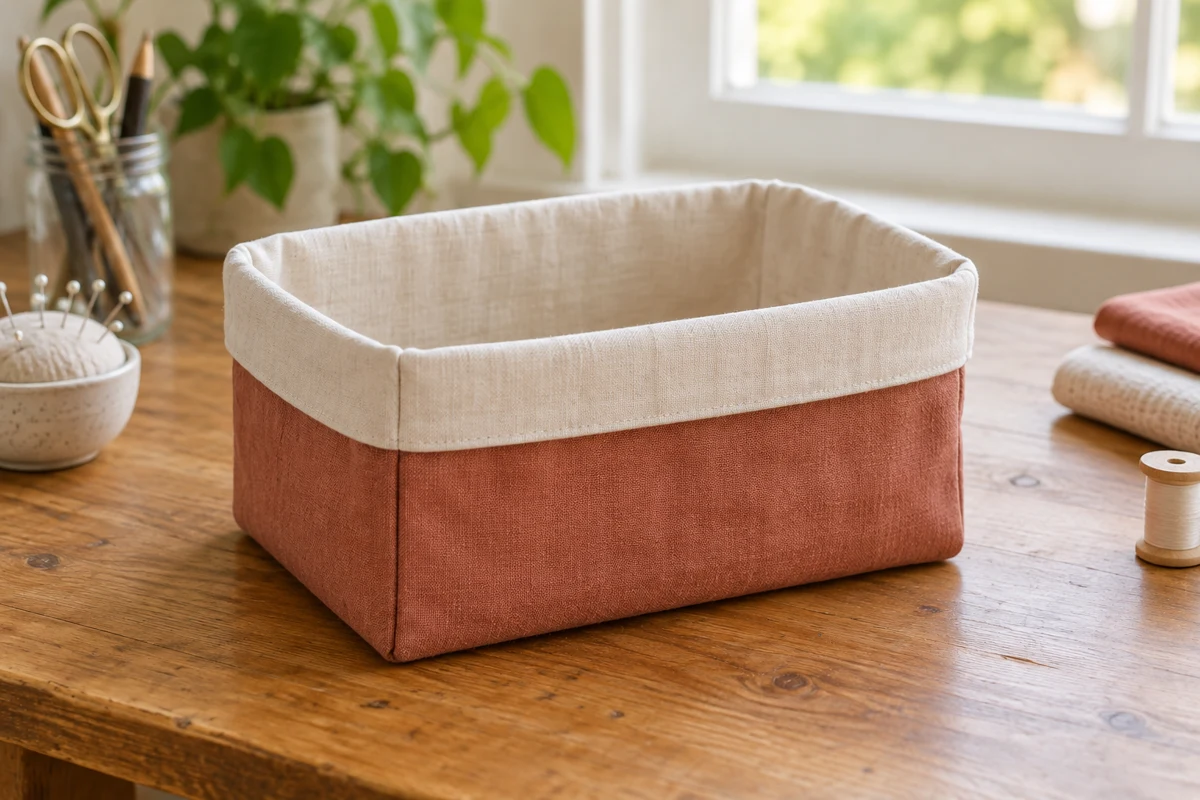
Boxed corners create the base of this lined fabric basket. A paper mock-up helps explain how the flat pieces become a three-dimensional shape.
Four rectangles and a material check
Cut two outer pieces and two lining pieces, each 22 × 18 cm, approximately 8⅝ × 7⅛ inches. Use a stable woven fabric outside and a slightly lighter one for the lining. All measurements include a 1 cm seam allowance. If you want more body, apply a compatible interfacing according to its instructions, checking both heat tolerance and flexibility on a scrap first.
This basket holds light items such as thread spools, sewing clips, or folded cloths. It will not behave like a rigid box. Fold a rough paper model if it needs to fit a particular shelf. Boxing the corners takes width and height from the flat panels while creating depth, so the original rectangle dimensions are not the finished outside measurements.
Sew the shell and lining separately
Put the outer pieces right sides together and sew both sides and the bottom with a 1 cm allowance. Leave the top open and press the allowances apart. Assemble the lining the same way, but leave a turning gap about 7 cm long in its bottom seam. Secure the ends of this gap so they do not unravel during turning.
To form a corner, pull the front and back apart until the side seam lies directly over the bottom seam. The corner now forms a triangle. Measure 3 cm along the seam from the sewn tip and draw a line across the triangle, perpendicular to that seam. This line is approximately 6 cm long and establishes the basket's base depth.
Stitch along the marked line. Repeat at the other shell corner and both lining corners. Compare all four measurements before trimming. Matching the distance from the sewn tip matters more than making a loose triangle look symmetrical on the table. Trim the excess points only afterward, leaving approximately 1 cm beyond each new seam.
Join the baskets around their upper edges
Turn the outer shell right side out and leave the lining wrong side out. Place the shell inside the lining so their right sides touch. Match the side seams and upper edges, then pin around the opening. Sew the entire rim with a 1 cm allowance, keeping the lining's bottom gap clear of the seam.
Pull both layers carefully through the lining opening. Close that gap with small hand stitches or a narrow machine seam. Push the lining into the shell and settle the boxed corners together. Roll the upper seam between your fingers so the lining does not protrude unintentionally. Press as the materials allow and topstitch near the rim if desired.
Understand what boxing the corner changes
The seam across a boxed corner is approximately twice its distance from the sewn tip. A 3 cm distance therefore gives a base depth around 6 cm. This also reduces the visible face dimensions. You cannot increase depth without reconsidering the remaining width and height. The original flat rectangle can give a misleading impression of the eventual usable volume.
For a basket that must fit a specific shelf, make a paper or inexpensive-fabric prototype with its seam lines marked. Fold or stitch on those lines, then measure the formed sample. Thick outer fabric and interfacing may require a slightly smaller lining circumference to prevent bunching. Do not subtract a large arbitrary amount; assess the actual layers being used.
A folded-down rim can make the basket appear lower and provide some support to the walls. It needs enough spare height. Try the fold on the prototype before adding trim or a fixed edge. For thread and sewing clips, a broad low shape is often easier to use than a tall narrow container where the small contents disappear at the bottom.
Read the shape before changing the pattern
Set the empty basket on a flat surface. If it rocks, inspect the boxed corners and the position of the lining. A bunched lining base can make a straight shell appear crooked. Pull the lining out briefly, redistribute the corners, and try again before assuming the cutting was wrong.
A removable covered base insert can support the bottom, but it will not automatically stiffen soft walls. For the next version, consider a firmer outer fabric or a suitable interfacing. Measure the actual finished width, depth, and height and keep those figures with your cutting notes. When enlarging the basket, adjust the boxed-corner depth deliberately rather than doubling every dimension without considering the resulting proportions.