Cut yarn from an old T-shirt
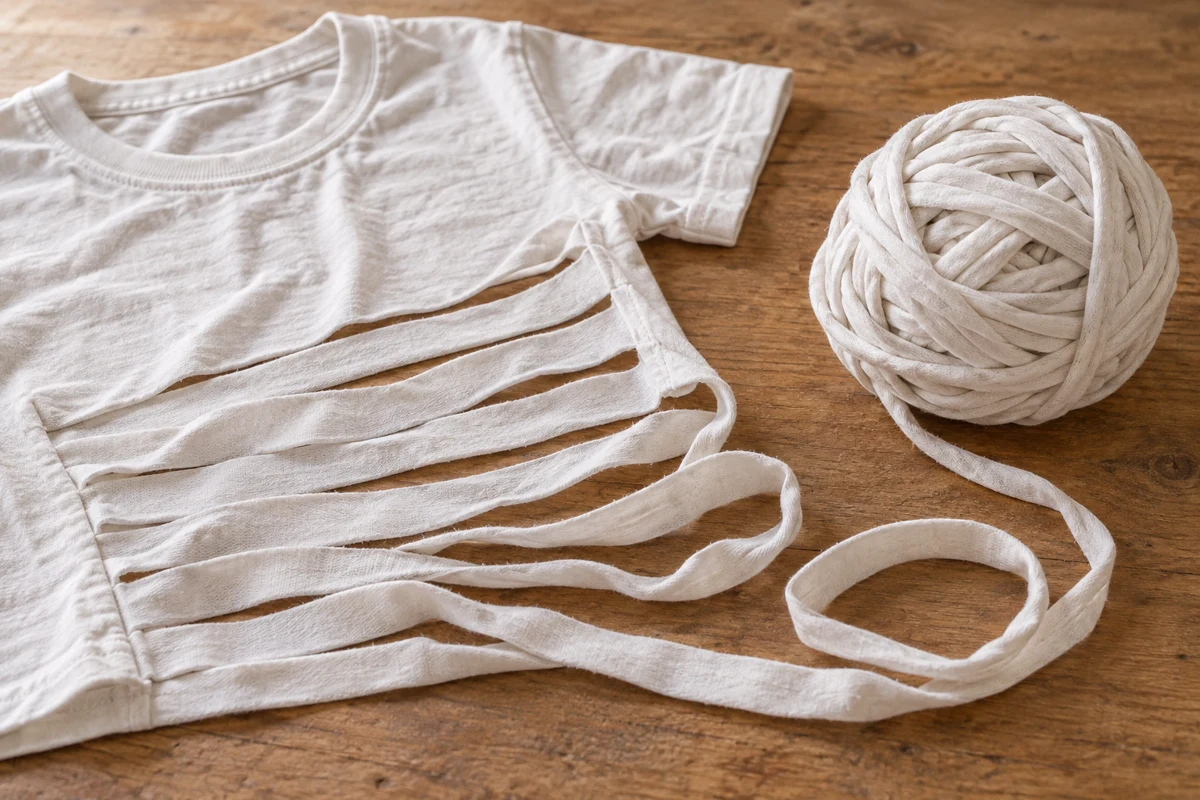
A smooth T-shirt body can become one long fabric strip, but seams and fiber behavior affect the result.
Choose a suitable shirt
Use a clean shirt with a reasonably sound lower body. Large prints, holes and badly distorted areas interrupt the strip. Cotton jersey may curl when gently stretched after cutting, but not every fabric behaves that way. Test a small offcut before dismantling the whole garment.
A body without side seams produces more even yarn. Existing seams create thicker places, which may be acceptable for a coarse braid but awkward in fine crochet. Decide whether those changes in thickness suit the intended project rather than assuming all T-shirt yarn is interchangeable.
Prepare a closed fabric tube
Lay the shirt flat and remove its bottom hem. Cut across below the sleeves to leave a closed tube. Align it carefully, then fold it so one closed side stops short of the other, leaving an uncut zone a few inches wide on that side.
Cut parallel strips from the opposite folded edge toward that reserved zone, stopping before it each time. A width of about ¾ inch, or 2 centimeters, is a possible trial, though thinner cloth may need wider strips. The cuts remain connected because the final side area is still intact.
Connect the cuts diagonally
Open the uncut zone over a firm support so both rows of cut ends are visible. Join them with offset diagonal cuts: connect one end on the lower row to the next end on the upper row. This creates a spiral rather than separate rings. The first and last cuts become the beginning and end of the long strip.
If the sequence is unclear, draw it on a paper model first. A misplaced cut creates short lengths that need joining later. Work slowly and check after the first few connections that one continuous strip is emerging.
Understand the cutting sequence on paper
For a paper model, tape a rectangle loosely into a ring at its short ends. Flatten it and draw the parallel cuts without crossing the reserved side area. Open that area and number the cut ends on both sides. The offset path connects each end to the next section rather than to its directly matching number. That shift keeps the route spiral-shaped.
Cut the model and pull out the resulting strip. Separate rings mean at least one connection ran straight across rather than diagonally onward. This trial is especially helpful after side seams or an uneven hem have made the fabric orientation confusing. Transfer the principle, not the paper dimensions: suitable strip width still depends on your fabric’s thickness and stretch.
Wind it only after checking
Stretch the finished strip gently in sections. Stop if thin places tear. Curling depends on the material and should not be forced. Remove hard seam remnants or printed patches if necessary, joining the ends in a way suited to the eventual project. Each join remains a thicker area.
Wind loosely without storing the yarn under tension. A short braid or crochet sample reveals thickness and give better than the ball alone. This material is not load-bearing rope. Use it for lightweight decorative work, and estimate the available length before beginning something that needs a large quantity of uniform yarn.