Tote handle length and attachment
Handle length depends on how you carry the bag and how much strap disappears into the attachment.
Try the usable loop against your body
Hand-carried and shoulder-carried bags need different openings. Pin a length of ribbon to an existing bag or a paper mock-up and try it with the clothing you normally wear. A loop that fits comfortably over a light shirt may be awkward over a jacket.
Cut length is not free length. If 4 cm at each end is secured beneath the top hem, the visible loop loses 8 cm overall, just over 3 inches. Mark both attachment lines on your trial strip. This lets you judge the opening you will actually have after sewing rather than an unrealistically long loose strip.
Look at the attachment spacing with some volume
Do not judge the handles only on a flat bag. Put a few lightweight rolled cloths inside and hold the provisional attachments over the table. This reveals whether the rim gapes widely between the handles or gathers sharply. Remove the contents and exposed pins before trying anything against your body.
Wider spacing can open a broad tote, while closely placed handles pull its center upward. The appropriate location therefore depends on bag width too. Transfer the final marks to both faces and record their distance from the center. That preserves an otherwise invisible design choice for a second version.
Match width and material
For a light bag, fold a fabric strip into four layers: press the long edges to the center, fold again, and stitch along both long sides. A strip 12 cm wide produces a handle about 3 cm wide, approximately 1¼ inches. Thickness depends on the fabric. Four layers of heavy canvas may already be too much for a particular household machine.
Ready-made webbing avoids the folding step, but it still needs to suit the bag and its care routine. Secure its cut ends appropriately. Do not automatically seal unidentified synthetic webbing with a flame. Enclosing the ends in a hem or binding gives a more controlled finish without creating hard melted spots.
Align both pairs of attachments
Lay the bag flat and mark the center of each side. Measure equal distances left and right for the handle ends. Compare the two bag faces as well as the pair of ends on each face. Run your hand around each loop before sewing; a half twist can disappear visually into a patterned strap.
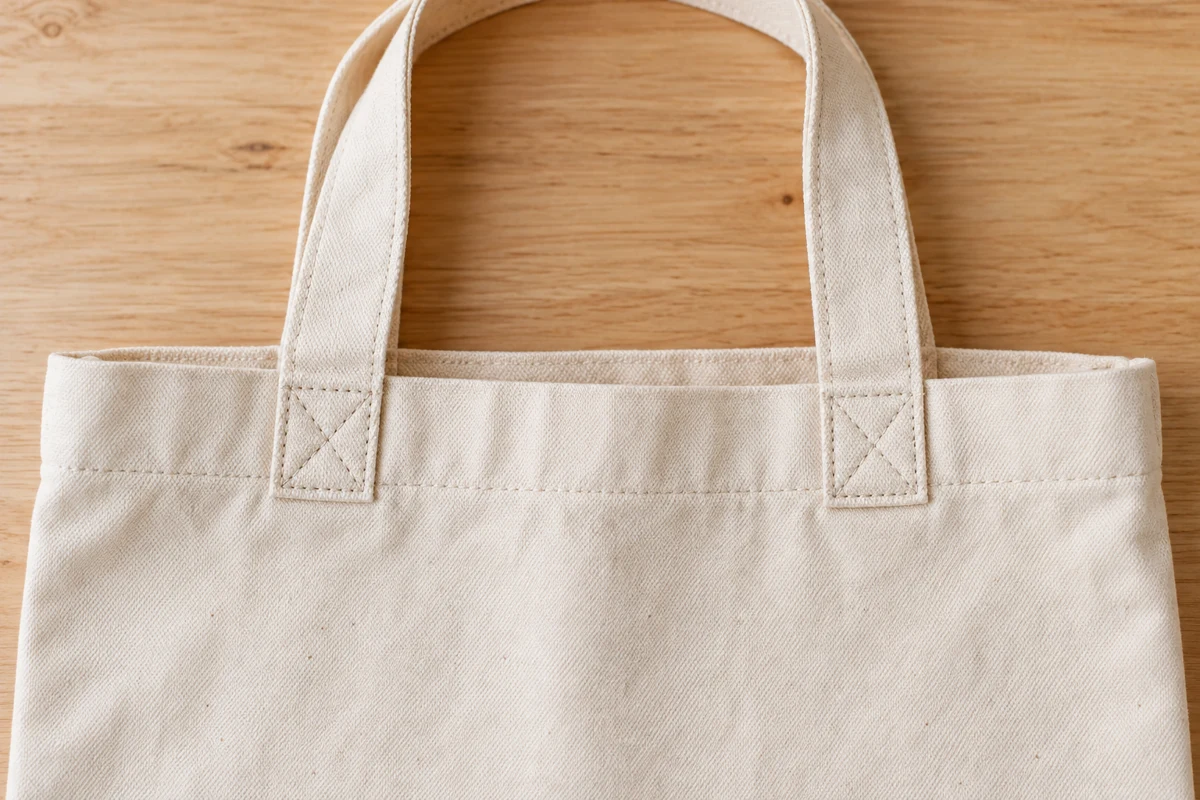
Attach the ends through a reinforced upper area rather than a single thin layer. A stitched rectangle with diagonals spreads the connection over more cloth. It does not replace sound material or establish a load rating. Test the full stack first, checking that the needle penetrates and the machine feeds it without force.
Inspect after the first uses
Compare the handles after carrying a few light loads. If one stretches or an attachment pulls diagonally, examine the fabric and stitching there. Adding another seam directly over torn fibers does not restore the material. The attachment needs sound cloth beneath it, or a suitably larger reinforcement extending beyond the damaged area.