Shape a small cord bowl
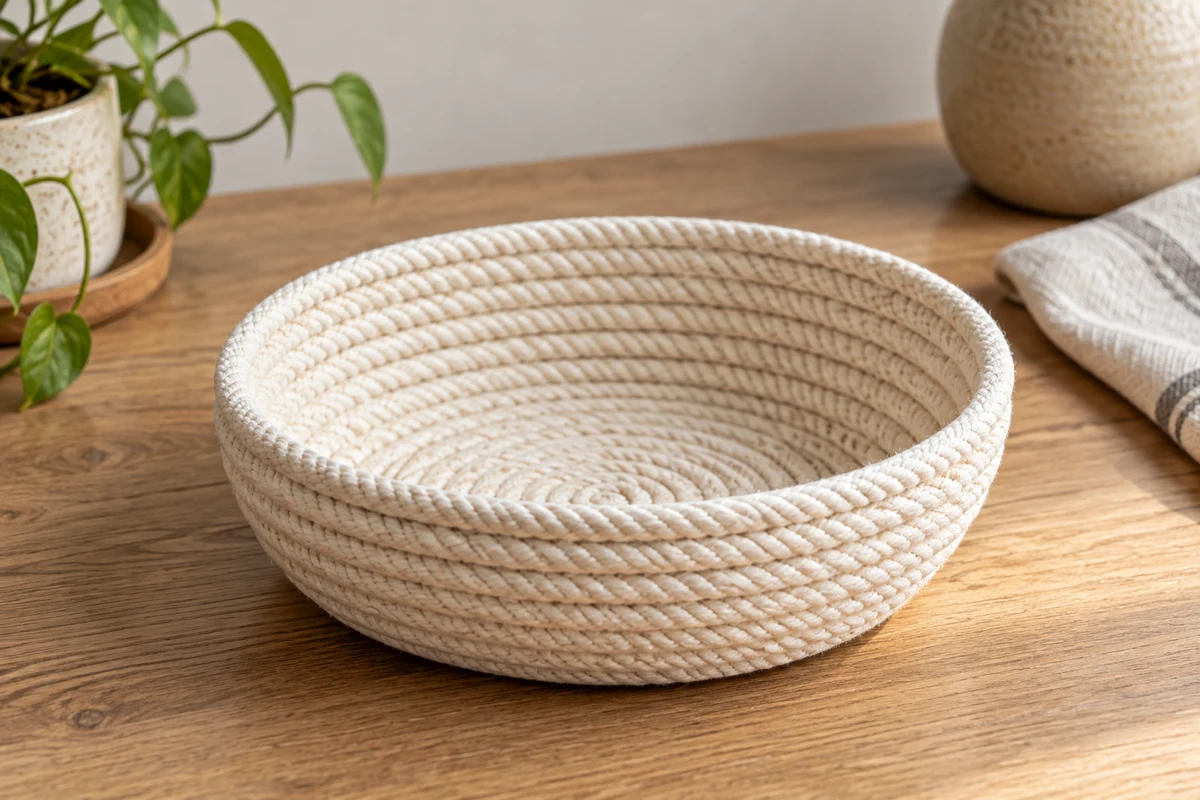
A hand-sewn cord bowl starts as a flat coil. Raise the rounds only after the base sits properly.
Keep the first bowl small
Plan a shallow container for dry, lightweight supplies such as thread ends or sewing clips. It is not a carrying bag, food vessel, or holder for hot objects. Soft cotton cord with an even diameter is easier to shape than stiff rope. Test whether a hand needle can pass through its outer fibers without force.
Set out suitable thread, a needle, and small scissors. Several manageable thread lengths are easier than one very long strand that tangles with every round. Secure new threads at an existing join and hide their tails within the cord structure. The stitching should connect neighboring rounds rather than cinching the entire cord flat.
Establish a level base
Make a close but relaxed spiral. Connect adjacent sections with small stitches, placing the work on the table repeatedly to inspect it. A first base about 8 to 10 cm across, roughly 3 to 4 inches, is enough. Measure in two directions so an unintended oval does not become apparent only after the walls are built.
If the base cups, release the latest round and replace it with less tension. Simply pressing a tightly sewn curve flat by hand often produces a shape that springs back. A level base gives the bowl its footing. An irregular decorative rim can be appealing, but a rocking bottom interferes with its purpose.
Raise the sides gradually
Position the next round slightly above the previous one rather than entirely beside it. Sew it in that position. Maintain the same modest change in height around the circle instead of suddenly lifting one section. A shallow outward-sloping wall is easier to control than a steep narrow shape.
Inspect the profile after each round. A high area may indicate tighter pulling or different cord placement. Correct the latest connection while it remains accessible. Adding more rounds does not conceal the distortion; they inherit it. Rotate the bowl and adjust your hand position when access becomes awkward rather than pushing a needle through layers you cannot see clearly.
Distribute thread changes and joins
When little thread remains, finish at an already connected area. Make a few securing stitches through the outer fibers and hide the tail within the cord. Start the next thread slightly offset so one bulky knot does not carry every connection at that point. Check after the change that neighboring rounds still meet without a gap.
Do not combine a cord color change with the first steep rise of the wall. That creates two adjustments to control simultaneously. Practice in one color or place a change in an even established round. Both ends require proper attachment; an end merely tucked between coils may work loose later.
Set the bowl against a light surface and inspect from above while working. This reveals gaps that the outer cord texture can conceal. A missed join is still easy to add. If the wall stays uniformly soft, that may be a material characteristic rather than a sewing error. Limit its height instead of making the entire surface rigid with increasingly dense stitches.
Make a soft final join
Stop at a modest wall height before the sides become floppy or uneven. Lay the cord end along the final round and secure it in several places. Wrap a fraying tip with thread if necessary. Avoid a hard adhesive lump inside the bowl where delicate fabrics could catch.
Test with a few light objects and lift with your hand beneath the base. Pulling on the rim loads individual joins unnecessarily. A larger version needs more than extra cord: reassess the wall height, material thickness, and stability. Keep the first small bowl as a reference and note which round began the transition from base to wall.